Fonts play a big role in the way your website looks and feels. Your Design Kit (or Pricing kit) comes with a set of fonts carefully chosen to work well together and match the overall vibe of the design. Yet, if you are looking to adapt the kit to match your brand colors and fonts and want to replace them with your own, we prepared a guide to help you with the process.
How to update fonts on your Squaremuse template

At Squaremuse we use a combination of CSS code and Site Styles settings to set up fonts in all of our design kits. This allows us to explore more custom font options and create a unique aesthetic for our users. Some designs rely solely on custom fonts, that are not available inside Squarespace’s Site Styles and will be added through CSS code. Other kits use system fonts, available inside the Site Styles, and others use a combination of both.
To find out which fonts your design kit uses, check your documentation under STEP 2 - REVIEW STYLES article, where we included a list of the different styling elements and their font settings. If fonts are added via CSS code, we also included the line of code where you can find that specific setting. Please note that if you have modified the original CSS code, the line values might differ from the ones mentioned in the documentation.
Based on the different combinations of custom fonts and system fonts, there are four possible scenarios:
Your Design kit has custom fonts added via CSS and you want to replace them with custom fonts
Your Design kit has system fonts set in the Site Styles panel and you want to replace them with custom fonts
Your Design kit has custom fonts added via CSS and you want to replace them with fonts available in Site Styles
Your Design Kit uses a combination of Site Styles and CSS and you want to replace them with fonts available in Site Styles
Before we cover each scenario there are two important items you need to know:
Activating local CSS
Early in 2022, we changed the way we apply custom code in our Design/Pricing kits, moving all CSS and JavaScript code to files stored on our servers. Links to these files plus some customizable options are located in Settings > Advanced > Code Injection. In order to make changes to your CSS code to modify any font settings, you’ll need to add the CSS code locally into the Custom Code panel in the Design tab.
Inside your documentation, in STEP 3 - ADVANCED you’ll find the HOW TO EDIT AND CUSTOMIZE CSS CODE section, with instructions on how to add the CSS code locally as well as where all font settings are located in the code.
Uploading Custom Fonts via Custom CSS
If you want to use custom fonts that are not available inside Squarespace, you’ll need to upload your font files inside the Custom Code panel. We have a thorough article that will guide you through the process.
Now that you are aware of the above, let’s move into the scenarios and how to update the fonts.
1. Replacing Custom Fonts with your own Custom Fonts
In this case, after uploading your font files in the Custom Files panel, all you have to do is go through the code and change the kit’s font families with the fonts you’re replacing them with.
For example, let’s suppose we want to change the Kaneda Gothic font in Lyra’s template for a font called Aldo. Let’s say we have set the new font family name as ‘Aldo’ when uploading the file. All we need to do is change any mention of kaneda-gothic to the new font, as follows:
h2 {
 font-family: 'Mondia';
 font-size: 3.438rem;
 font-weight: 200;
 line-height: 100%;
 letter-spacing: -0.03em;
 text-transform: uppercase;
}
h2 {
 font-family: 'Dala Moa';
 font-size: 3.438rem;
 font-weight: 200;
 line-height: 100%;
 letter-spacing: -0.03em;
}
The new font might have a different size than the original one, so you might need to adjust settings like size, weight, or letter spacing.
In this scenario, you will need to go through the whole CSS code to update the font family wherever it is mentioned. It may take time but it’s pretty straightforward. Check the following video for a bit more clarity:
2. Replacing System Fonts with Custom Fonts
Any font properties set in the CSS code will override the font settings in the Site Styles panel. Therefore, all you need to do in order to add your own custom font is to add code with the new font settings in the CSS area. The downside in this case: there is no existing code in place to guide you and you will need to create the code for all font settings.
Since you’ll need to create the code from scratch, once you have uploaded your custom fonts (following this article), you can use the following code layout that includes most settings you might want to change. In this example, we have the basic settings for Heading 1:
h1 {
 font-family: proxima-nova;
 font-style: normal;
 font-weight: 400;
 font-size: 1em;
 line-height: 1.2em;
 letter-spacing: 0.02em;
 color: #000;
 text-transform: none;
}
Watch the next video to learn how to identify and change font settings using this code snippet.
3. Replacing Custom Fonts with System Fonts
If you want to replace custom fonts with System fonts - fonts available inside the Site Styles, remember that the font properties set in the CSS code are overriding any font settings in the Site Styles panel. You’ll need to disable any font settings in the CSS code and then set those properties in the Site Styles panel.
Go to the Design tab → Custom CSS → find the element and comment the ‘font-family’ (that means disable in code jargon) by enclosing that line of code between /* and */ as follows:
h1 {
/*font-family: ‘fontTitle’;*/
font-weight: 700;
font-style: italic;
font-size: 16px;
letter-spacing: 0.1em;
text-transform: uppercase;
line-height: 1em;
}
Assign the font from Site Style to a text element: Site Styles→ Fonts→ Choose the text element and select the new font:
In this case, we only commented the font family, but the rest of the settings, such as font size, letter spacing, etc… are still active on the CSS code. You can adjust the font properties (font-weight, font-style) in the code as per your preference, or if you prefer to have the properties set via Site Styles only, you can comment the whole section for the text element as follows:
/*h1 {
font-family: ‘fontTitle’;
font-weight: 700;
font-style: italic;
font-size: 16px;
letter-spacing: 0.1em;
text-transform: uppercase;
line-height: 1em;
}*/
You need to be careful when commenting code and not leave any brackets open. If that happens, you will see a red warning at the bottom of the code panel with the error MISSING OPENING ‘{‘ or MISSING CLOSING ‘}’. To avoid that from happening make sure you comment just a line of code or a full code syntax (with an open { and closed } bracket)
4. Replacing System Fonts with System Fonts
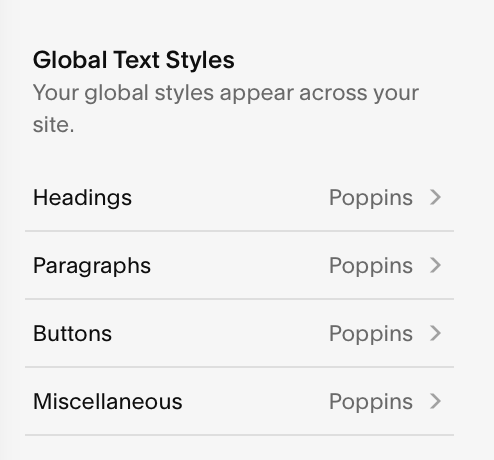
This is the easiest possibility: you just need to select a different Font Pack inside Site Styles and this will modify all the font settings automatically. If you prefer to select each font manually, first change fonts for the main elements in the Global Text Styles area: headings, paragraphs, buttons, and miscellaneous. These are the most important styles and will be carried on automatically to all elements across your site.
If you want to further personalize fonts for elements like the blog, shop, quotes, and forms, you can go to the Assign Styles panel and check which settings have been automatically set and change any to your liking.
As a note, have in mind that the Assign Styles panel only shows the font settings for the elements that are present in the page you are viewing at the moment in the preview window. If you want to change font settings for, let’s say, the blog, you’ll need to navigate to the blog page first and then access the Assign Styles tab and all blog options will appear. The same thing applies to all elements: you’ll need to be on the contact page to see form options, or on the shop page to see product options.
Now that you know how to change fonts both via CSS and Site Styles you can also combine any method. Just remember that CSS code will override settings selected in the Site Styles panel.
In a summary, here are the steps you need to take in order to change the fonts in your design template:
Learn how fonts are set up in your design kit. Refer to your documentation.
Determine the scenario that matches your situation: where are fonts set up (CSS of Site Styles) and which fonts you want to replace them with.
Follow the instructions presented in this article to replace them.
If you ever get stuck, know we are always there to help. Just reach out and our support team will give you a hand.
Have fun customizing your site and give us a shoutout when you launch your new site, we’d love to see what you’ve done with it!